How to Install Microsoft Authenticator
Check Microsoft Authenticator Installation
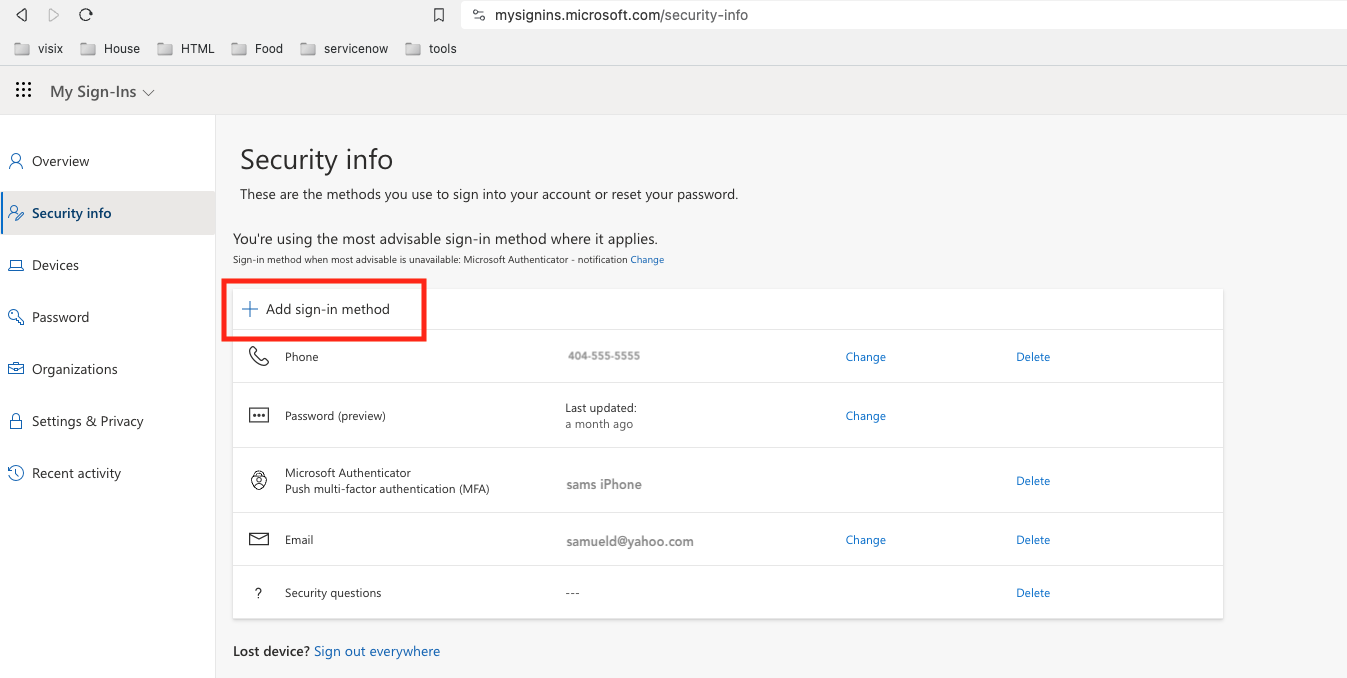
- Navigate to Microsoft My Sign-Ins
- Click on Security Info. View image below:
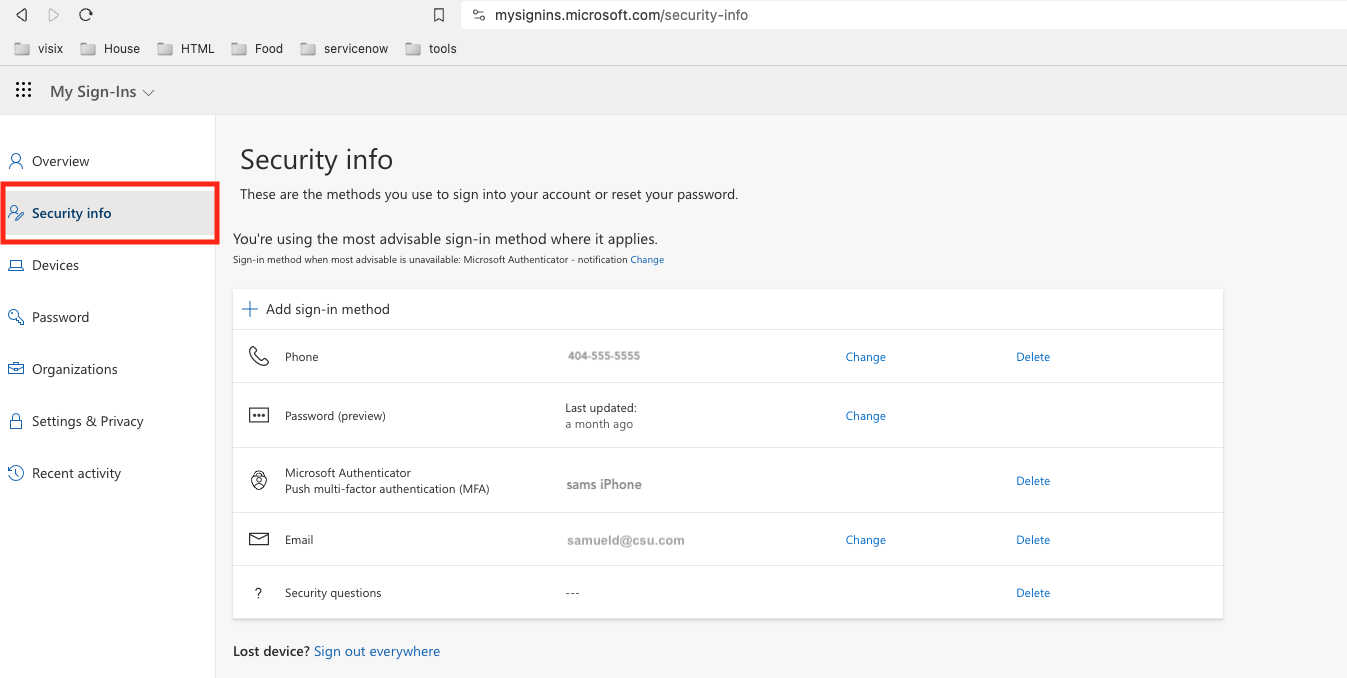
- Check to see if Microsoft Authenticator is installed.
Microsoft Authenticator: Installed ✅
Check if Microsoft Authenticator and device is listed. If if listed, no further action is needed.
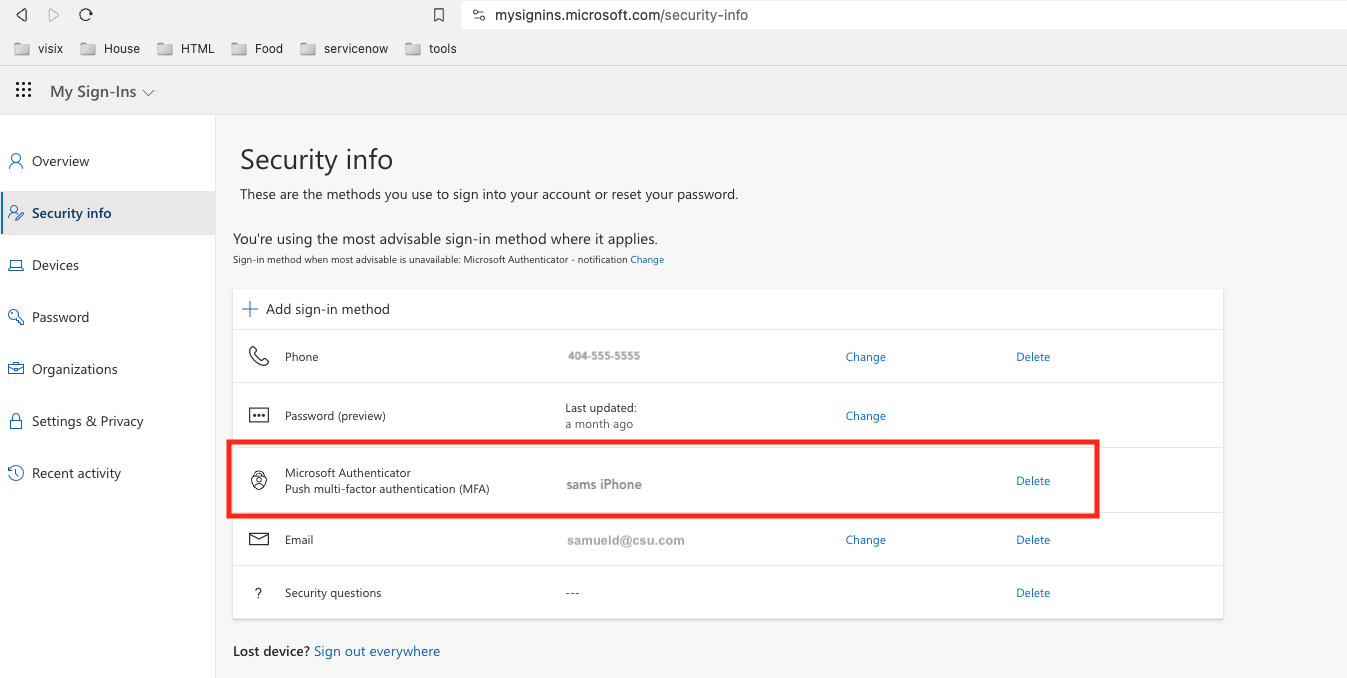
Microsoft Authenticator: Not Installed ❌
Microsoft Authenticator is not installed if the either of the following scenarios are observed.
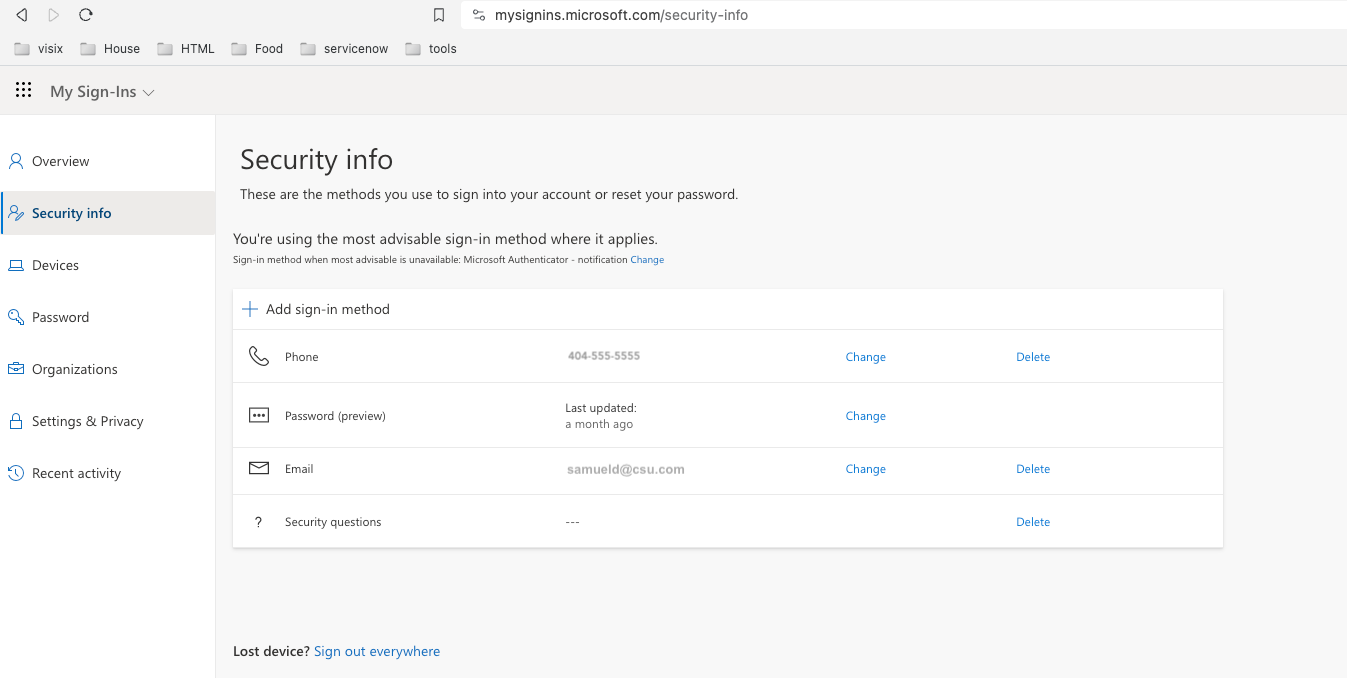
- Microsoft Authenticator: Not Listed under "Add sign method".
- Microsoft Authenticator: Listed but device is missing.
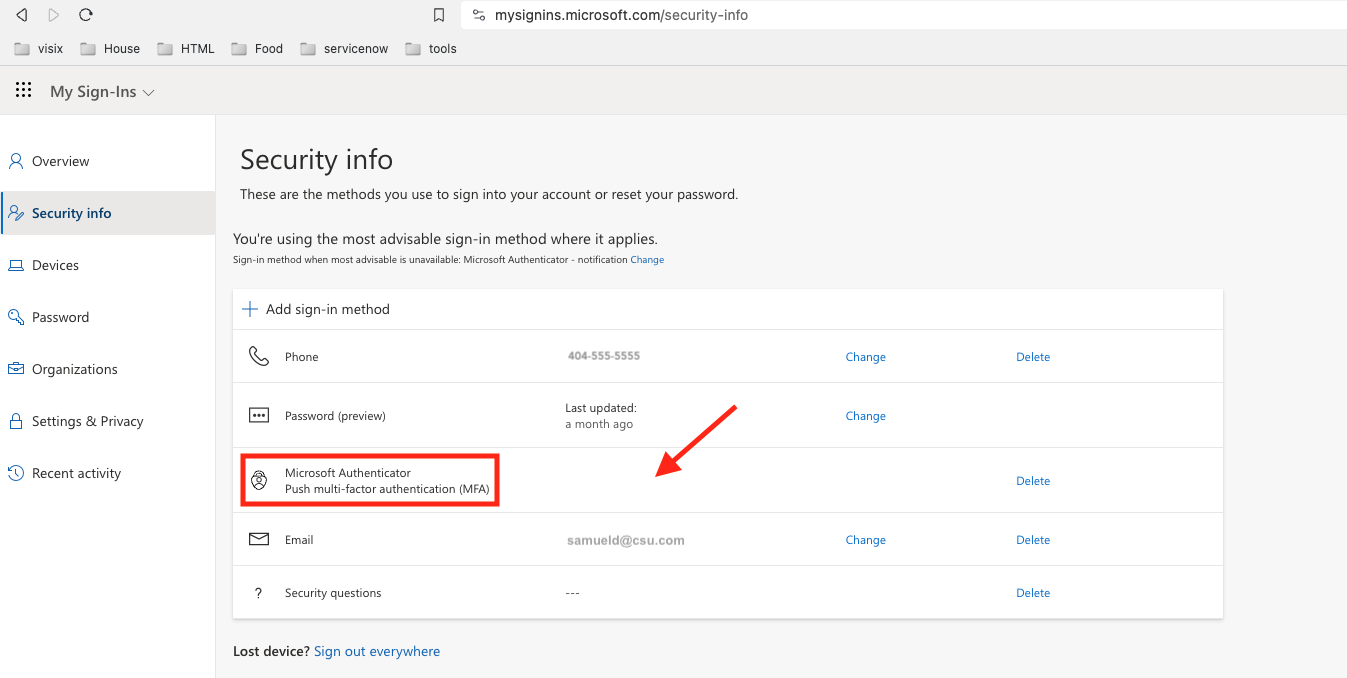
If Microsoft Authenticator or device is missing, please proceed with installation.
- Microsoft Authenticator: Not Listed under "Add sign method".
Install Microsoft Authenticator (MA)
Note: if you have Microsoft Authenticator already installed on your mobile device, skip to (step 6).
Install the Microsoft Authenticator app directly on your mobile device.
- Go to the Google Play or Apple Store on your mobile device or type "Microsoft Authenticator"in the search bar.
- Click the Download, Get button or Install button to download the app.
- Install the Microsoft Authenticator appon your phone.
- Launch Microsoft Authenticator, click allow notifications and accept.
- Once on the sign in page, pause and go to the computer.
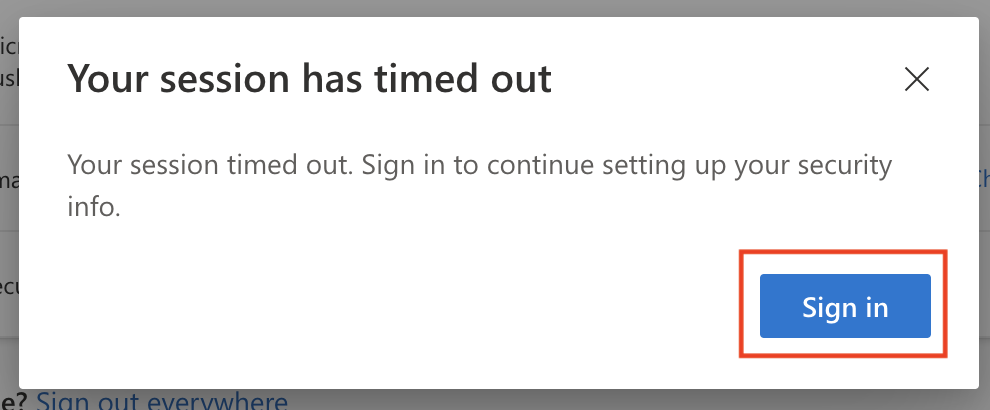
* If you have a pop-up blocker, please disable or add https://mysignins.microsoft.com/ to your safelist.
* If your session times out, Click the Sign in button in the “Your session has timed out” window to reactivate the session.
Computer
As we advance, you will utilize your computer and mobile device to complete the setup process.
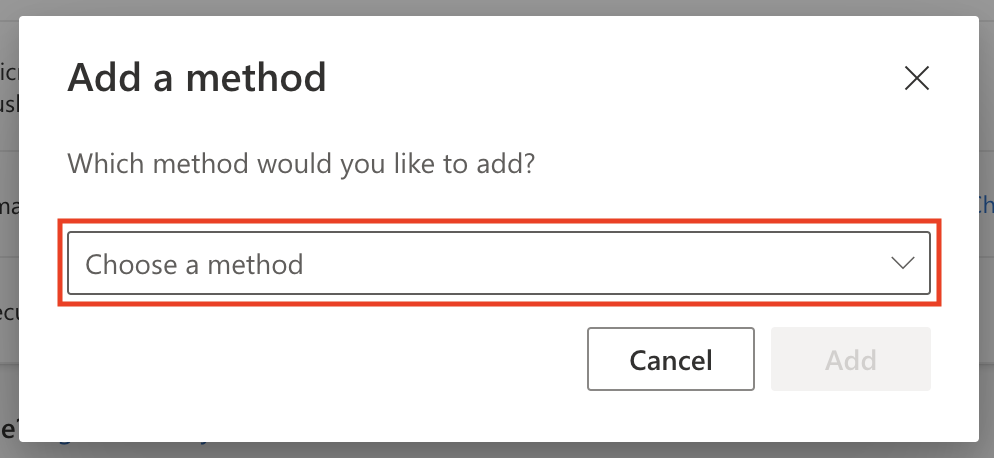
- On the “Security Info” page. Click“Add sign-in method.”A popup box should appear titled:“Add a method.”
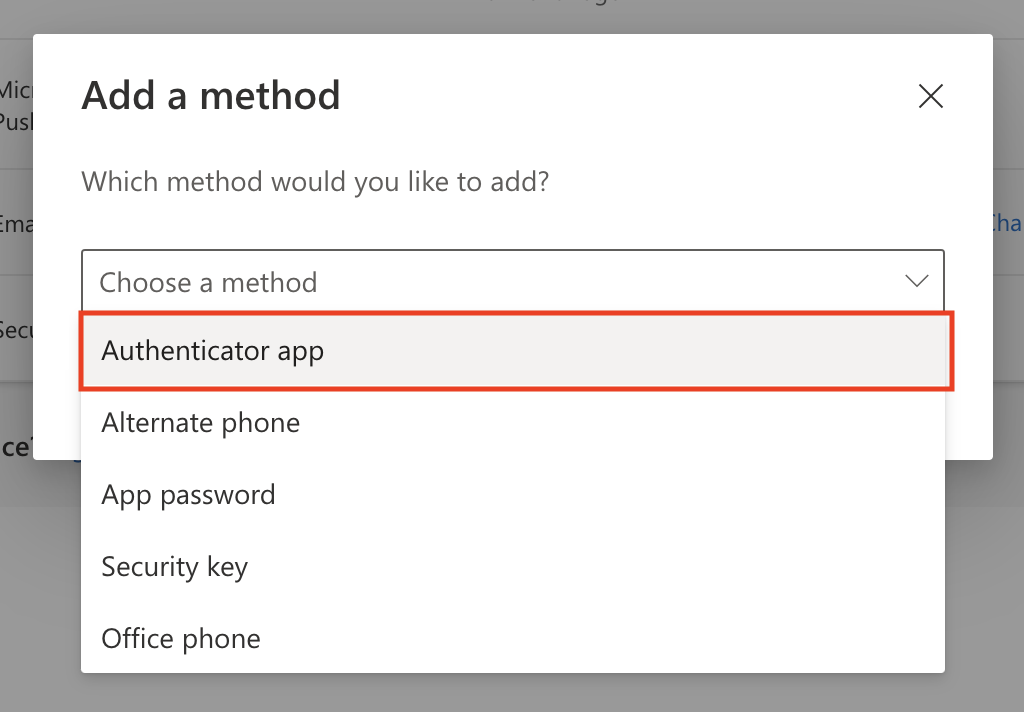
- Click on "Choose a method", select the Authenticator app from the dropdown window, click the Add button.
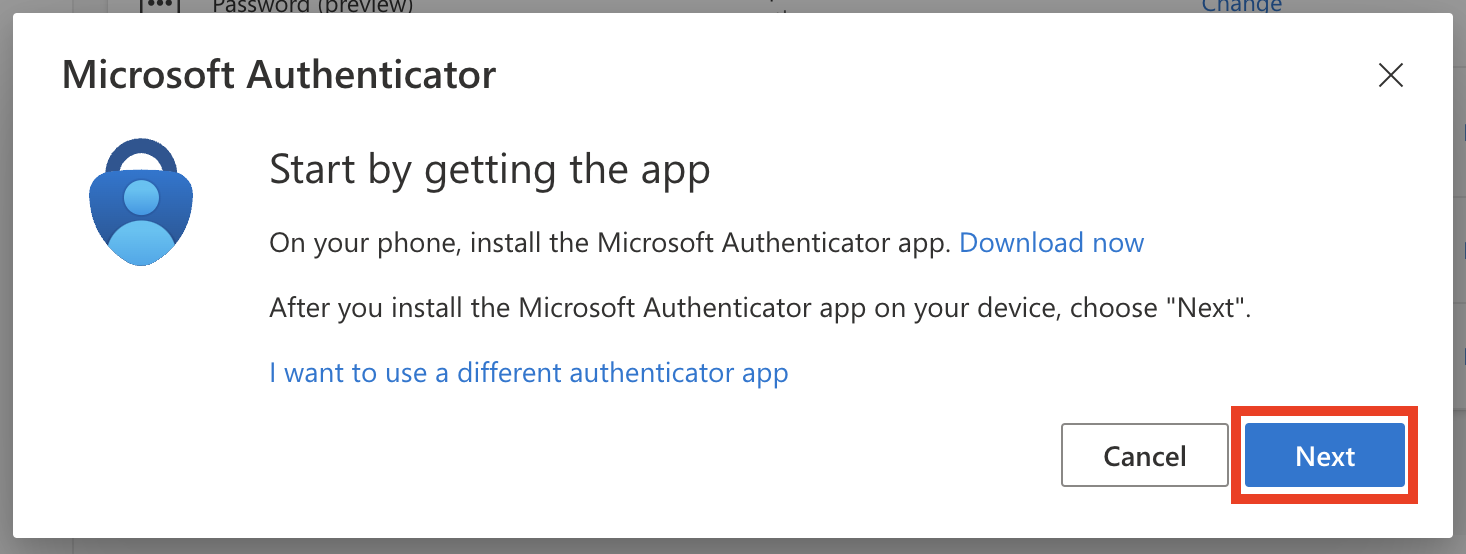
- Click theNext buttonin the“Start by getting the app”window.
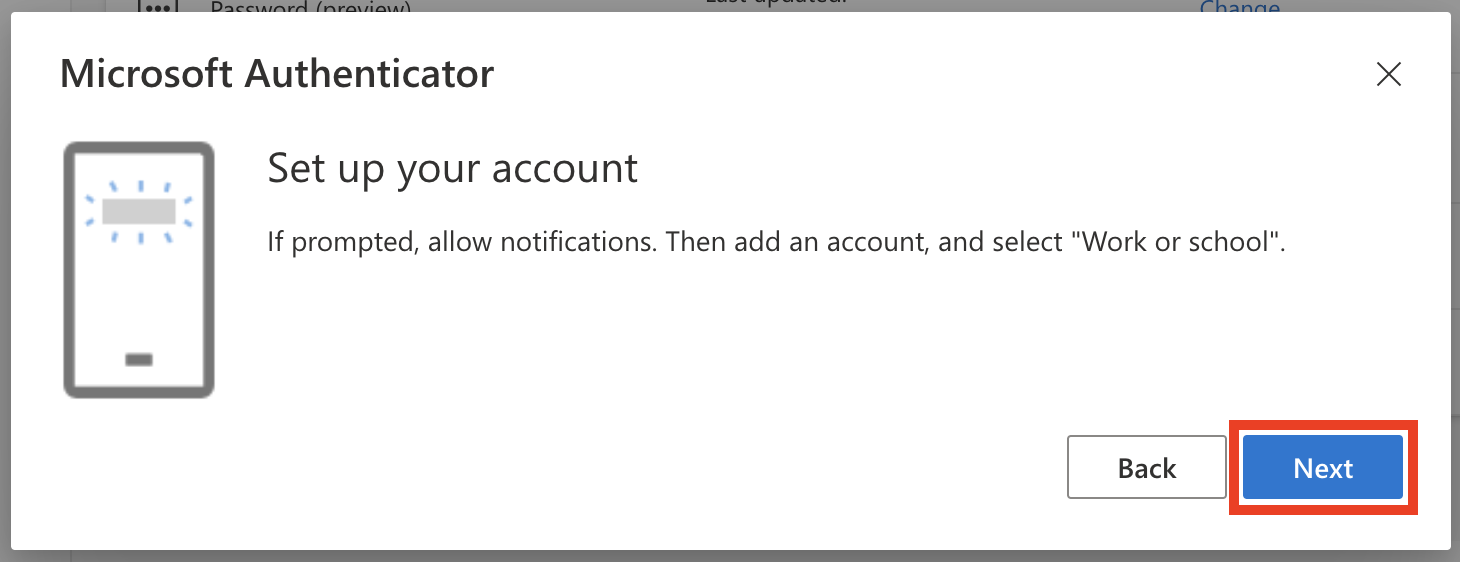
- Click theNext buttonin the“Set up your account”window.
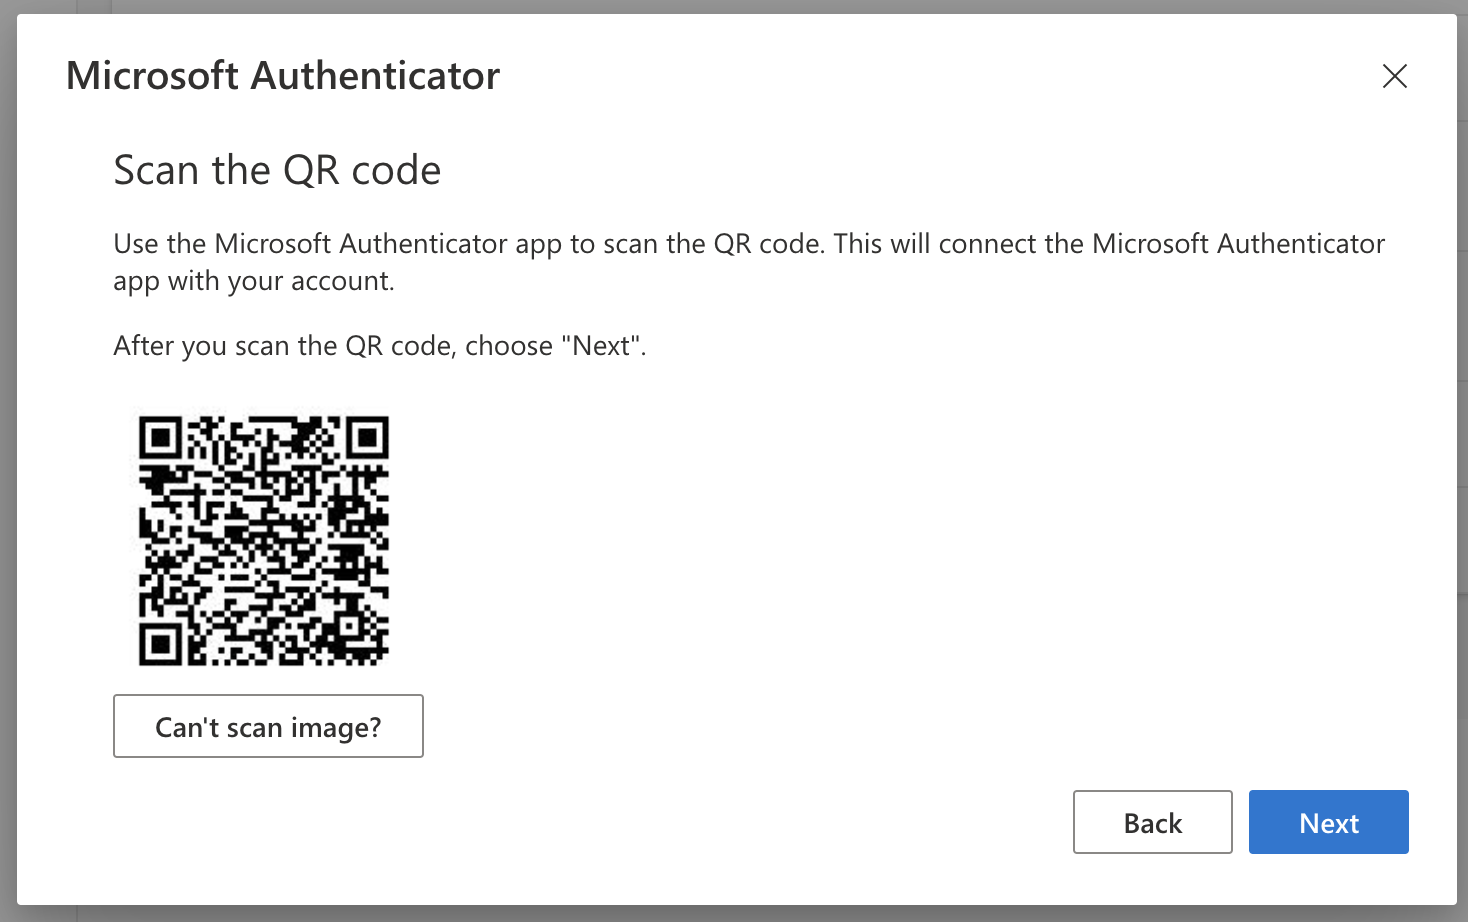
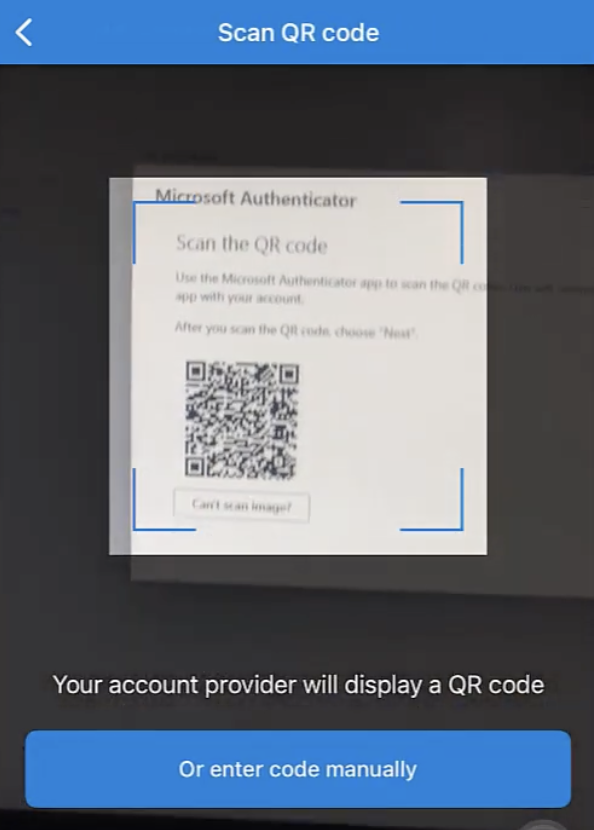
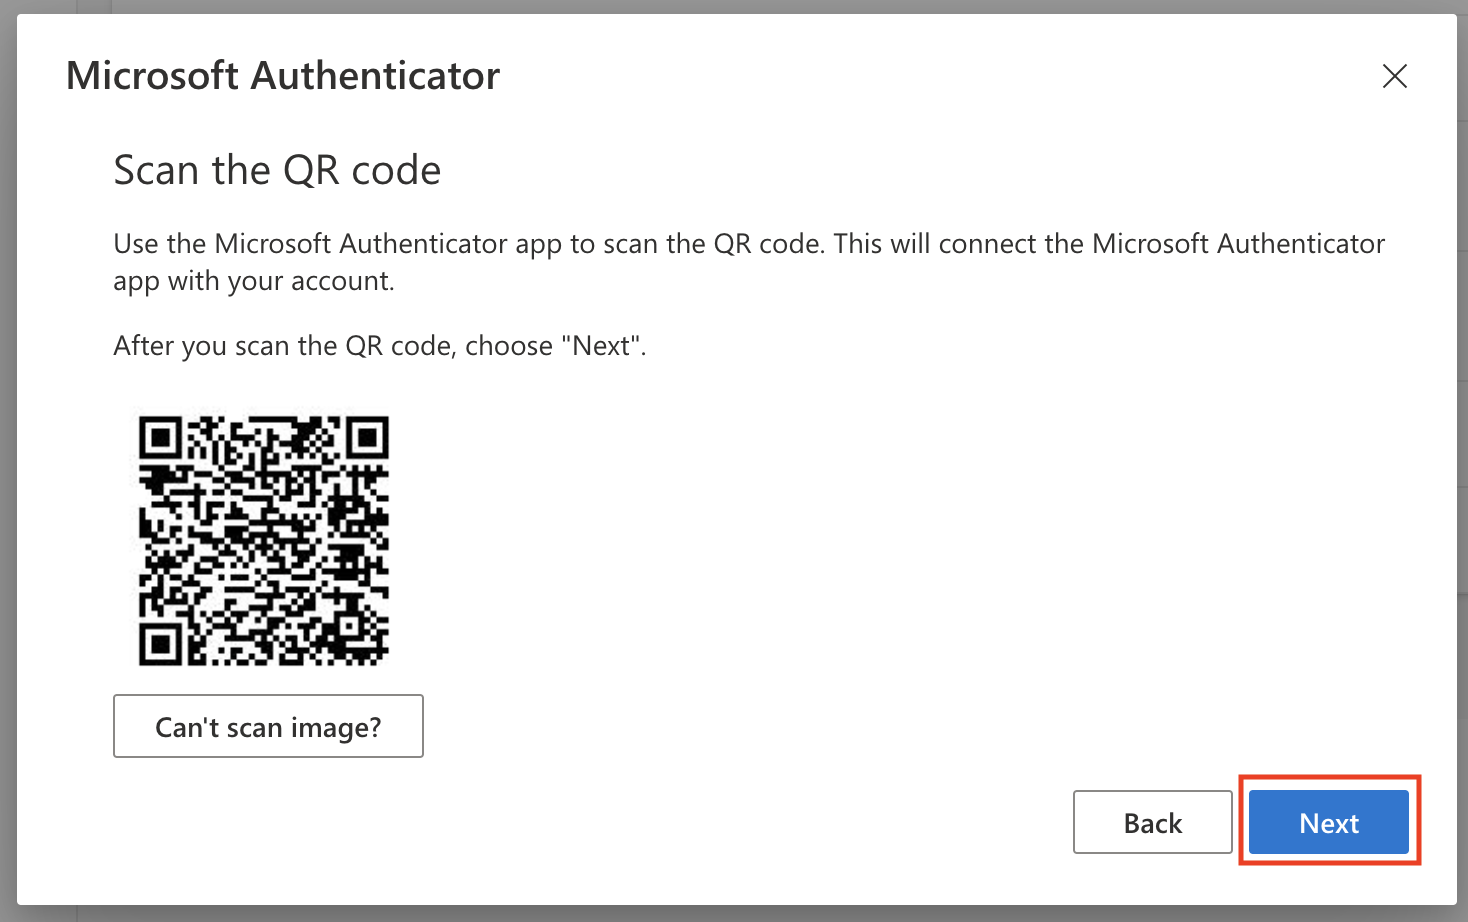
- The “Scan the QR code” window will appear. With the QR code prominently on your screen, pause and go back to your mobile device.
Mobile Device: Add New Account
If prompted, allow notifications.
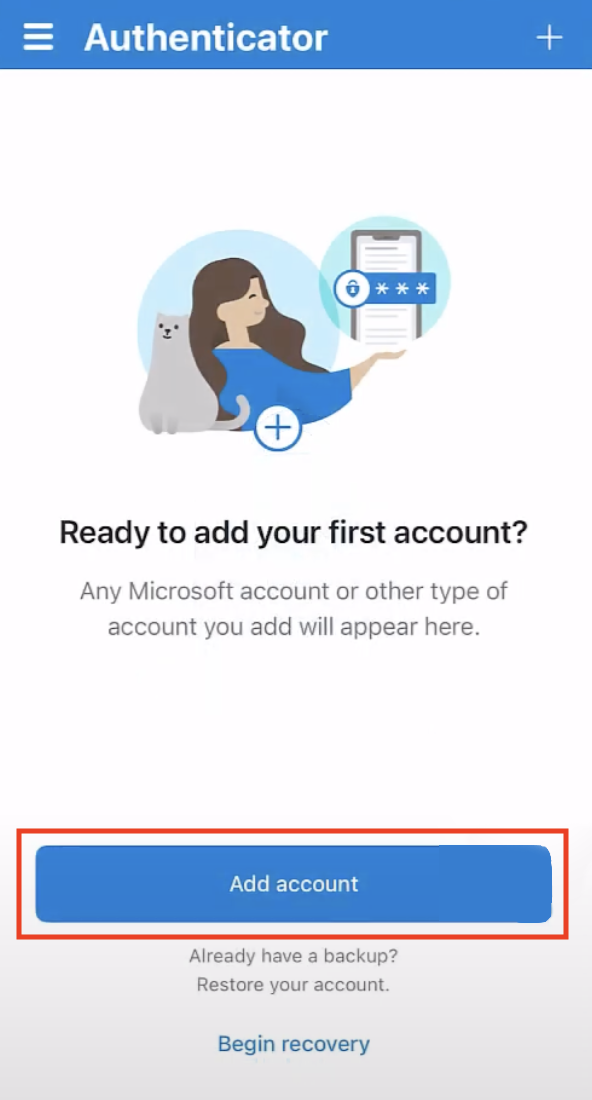
- Once installed, Click the Add Account button or Select (+) in the upper right corner.
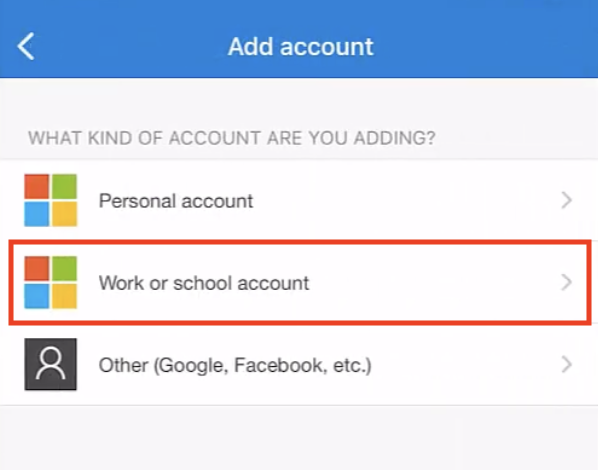
- Select Work or School account. Accept any requested permission prompt.
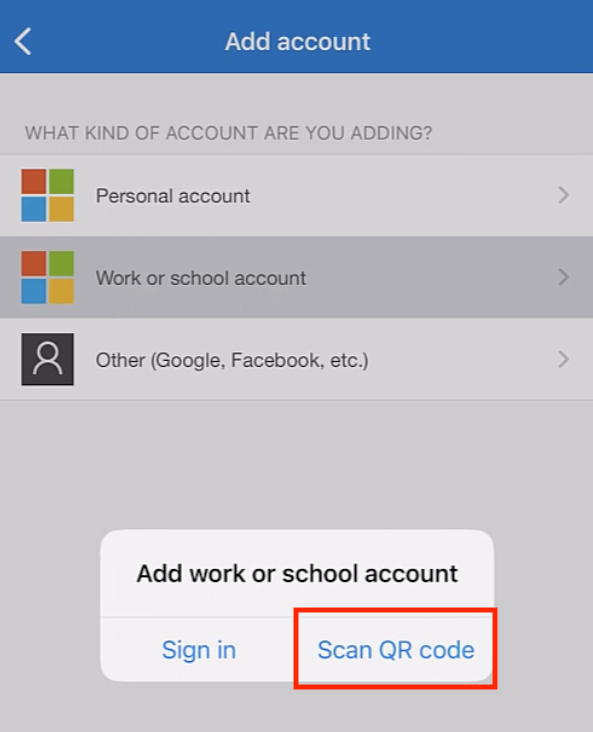
- A popup box should appear titled: “Add work or school account,” click “Scan a QR code”.
- Your phone’s camera will activate QR code authenticator app reader.
- With camera still activated, point your mobile device to your computer screen and scan the QR code displayed on the screen from (step 10).
- Once scanned, your new account will appear on the menu. An “Account added successfully” prompt might also appear to confirm your account was added.
- Now, go back to your computer.
Computer:
- Once scan is completed, Click the Next button on the “Scan the QR code” window.
- The “Let’s try it out” window will appear. It will send an "Approved sign-in" notification to your mobile device or generate a code.
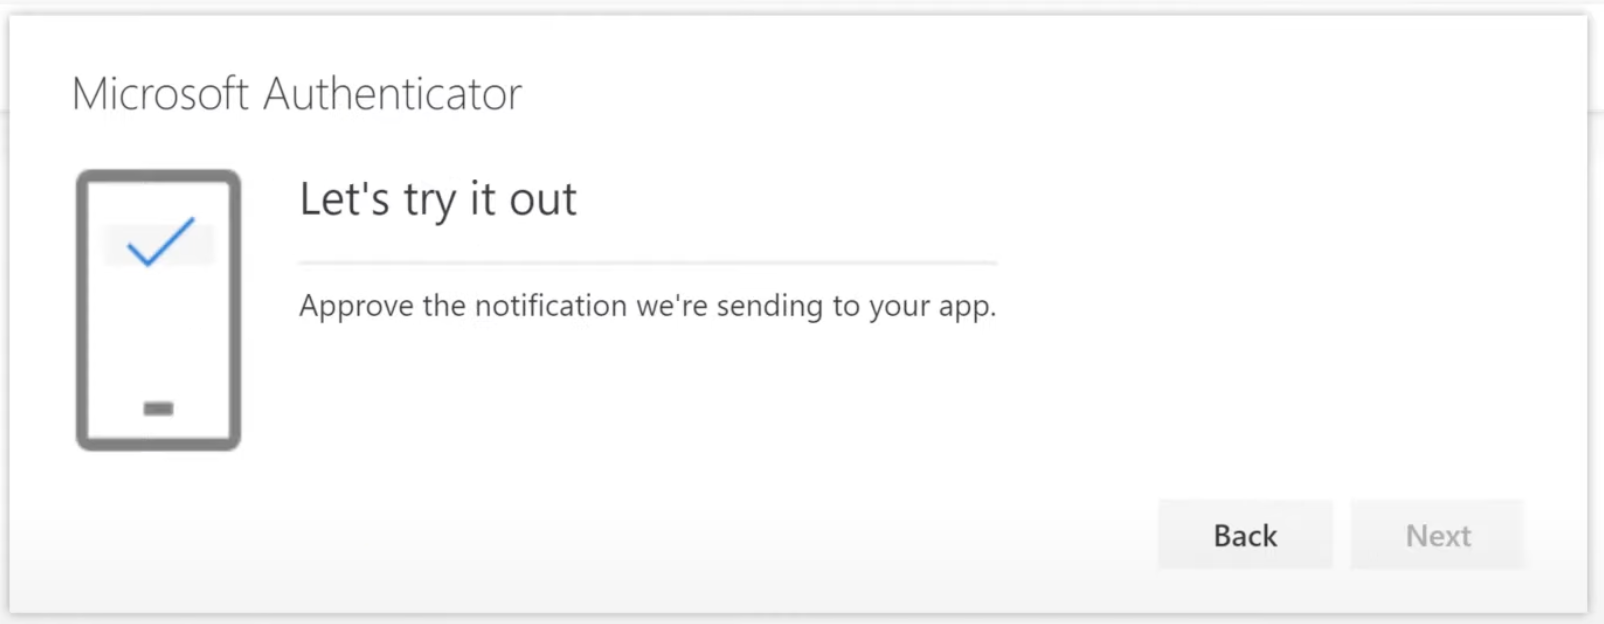
- Go to your mobile device.
- Mobile Device:
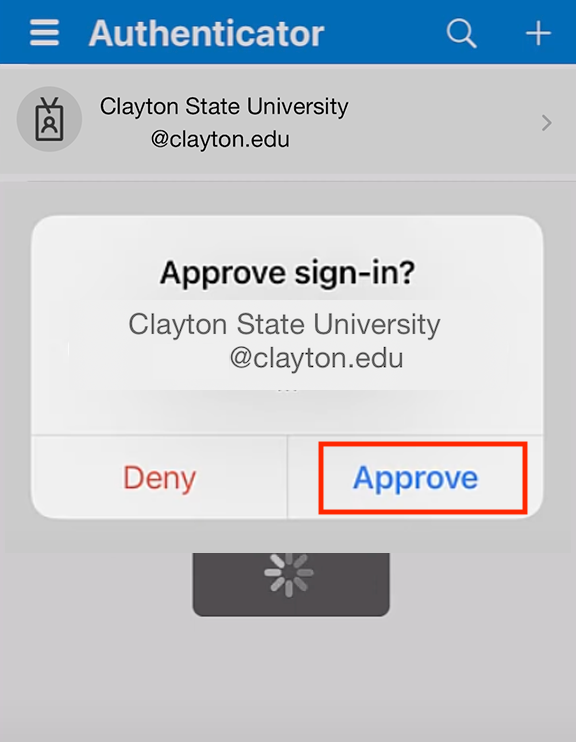
- If you see the "Approve sign-in?" window, click Approve.
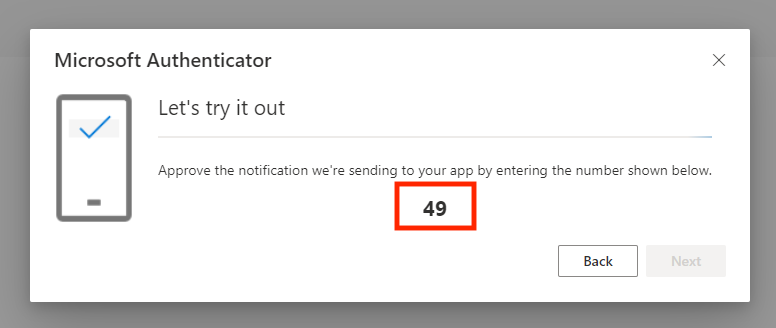
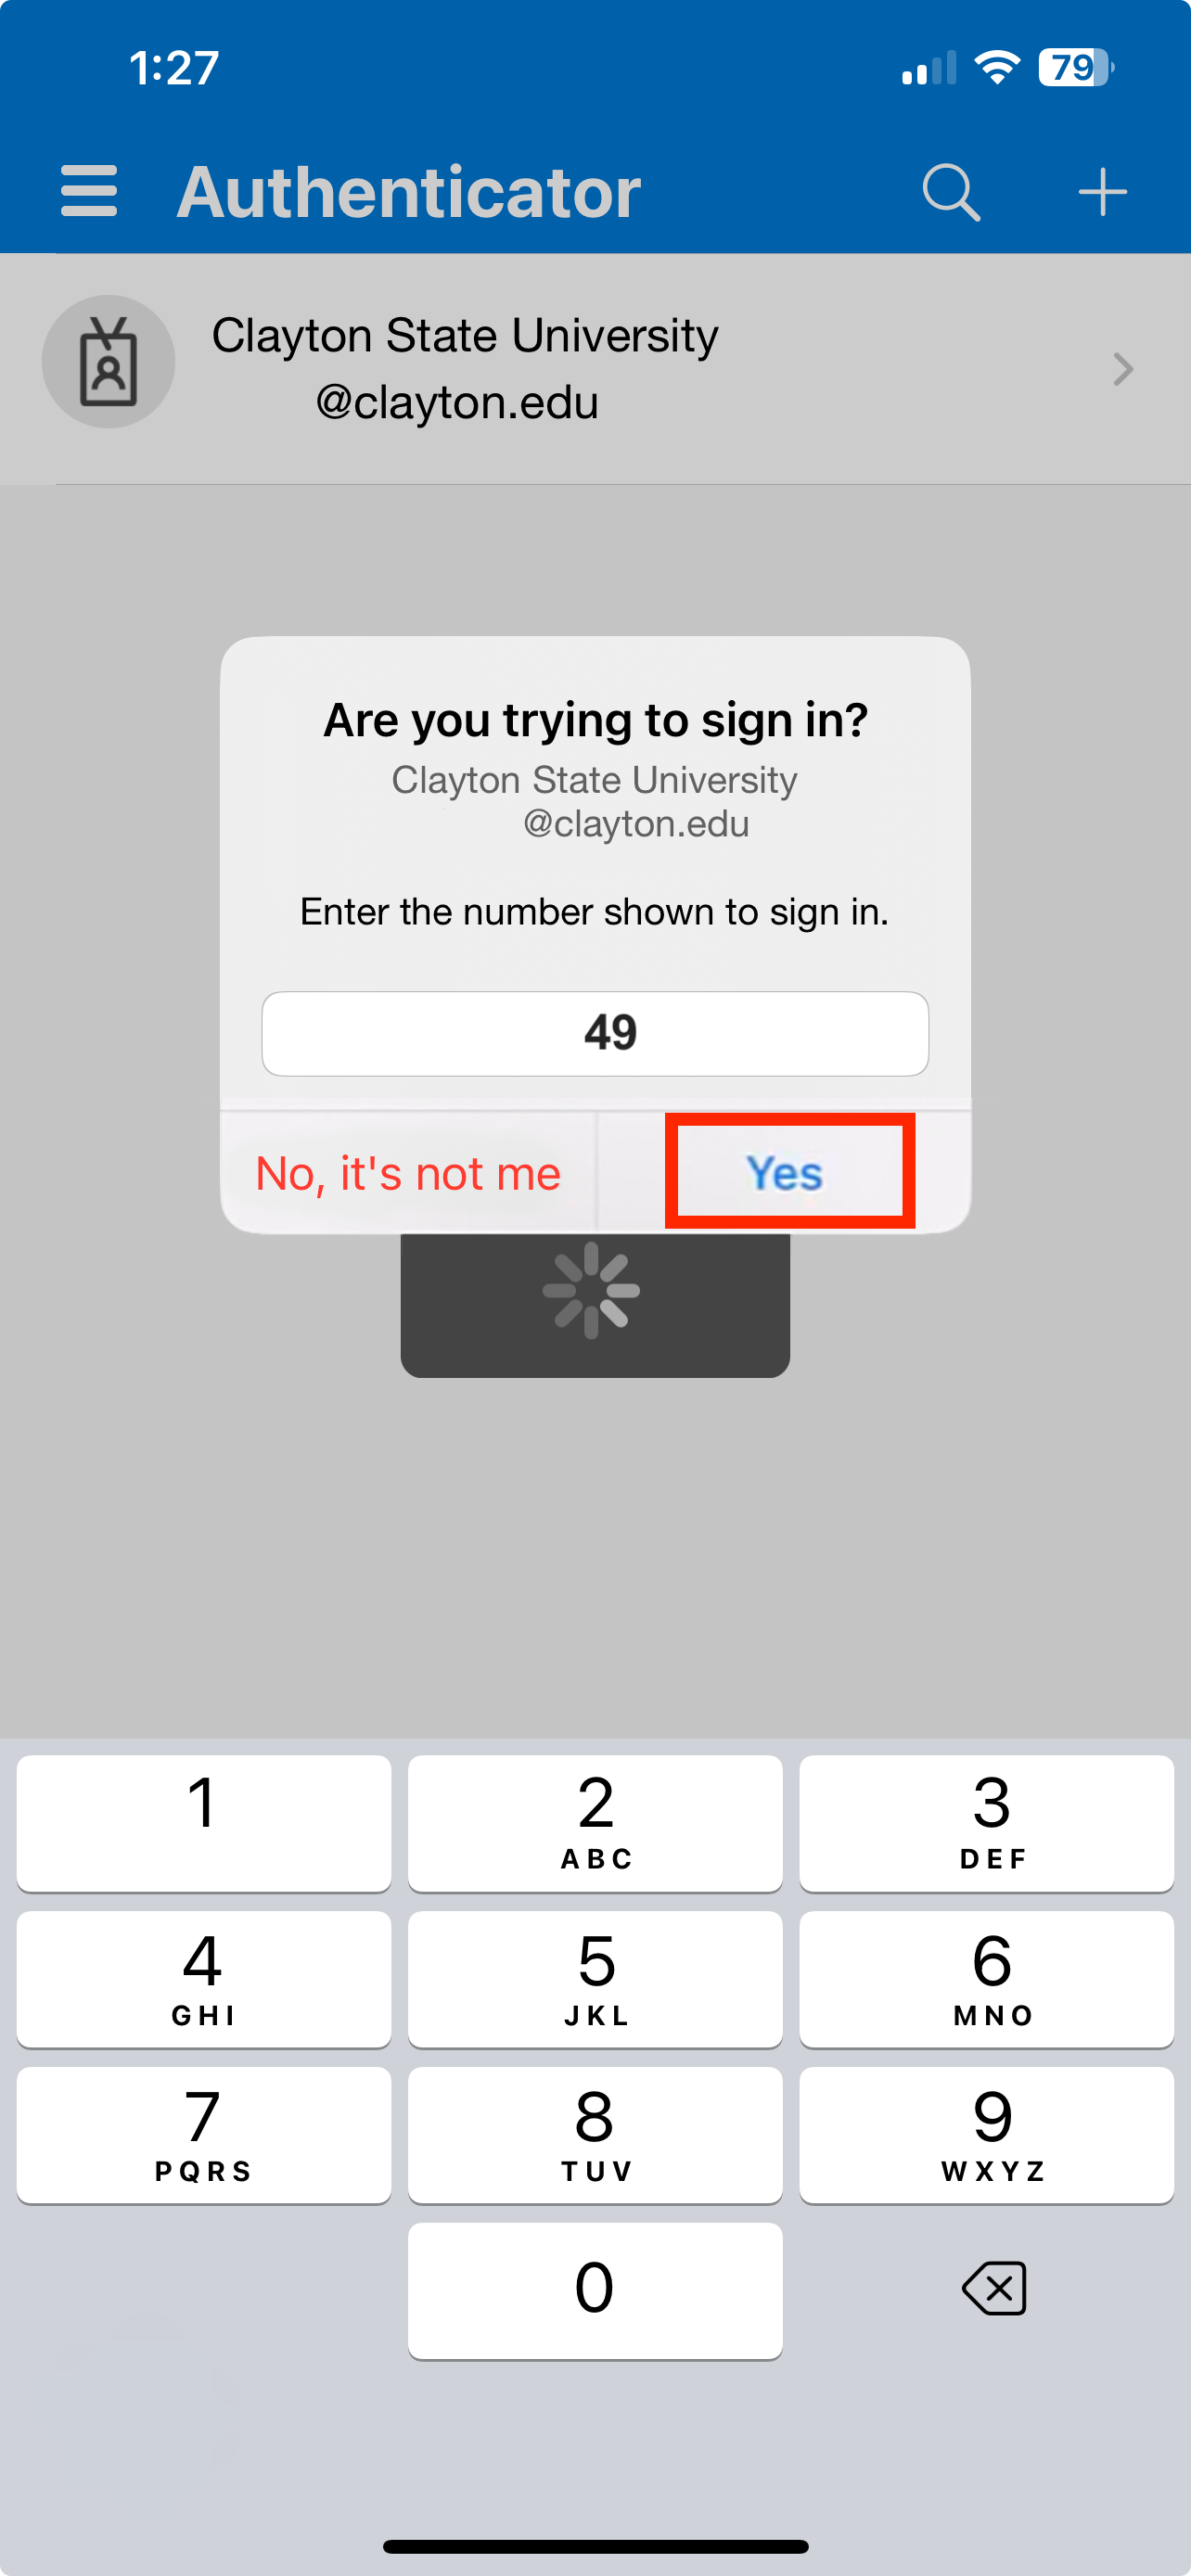
- If you see the “Are you trying to sign-in?”, enter the number generated in (step 19), click Yes.
- If you see the "Approve sign-in?" window, click Approve.
- Go back to your computer.
Computer:
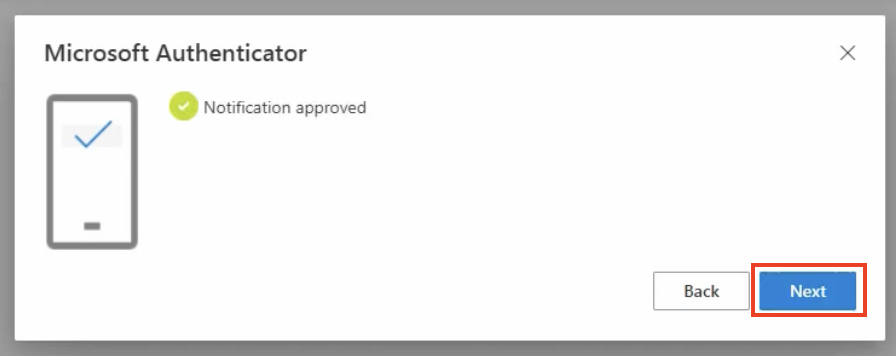
- On your computer, the “Microsoft Authenticator” window will state “Notification approved”.
Click the Next button.
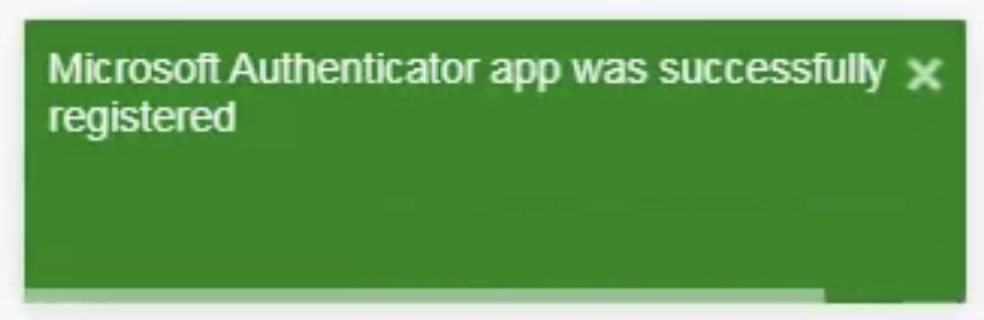
- A popup window will appear: "Microsoft Authenticator app was successfully registered."
in the top right corner of your screen.
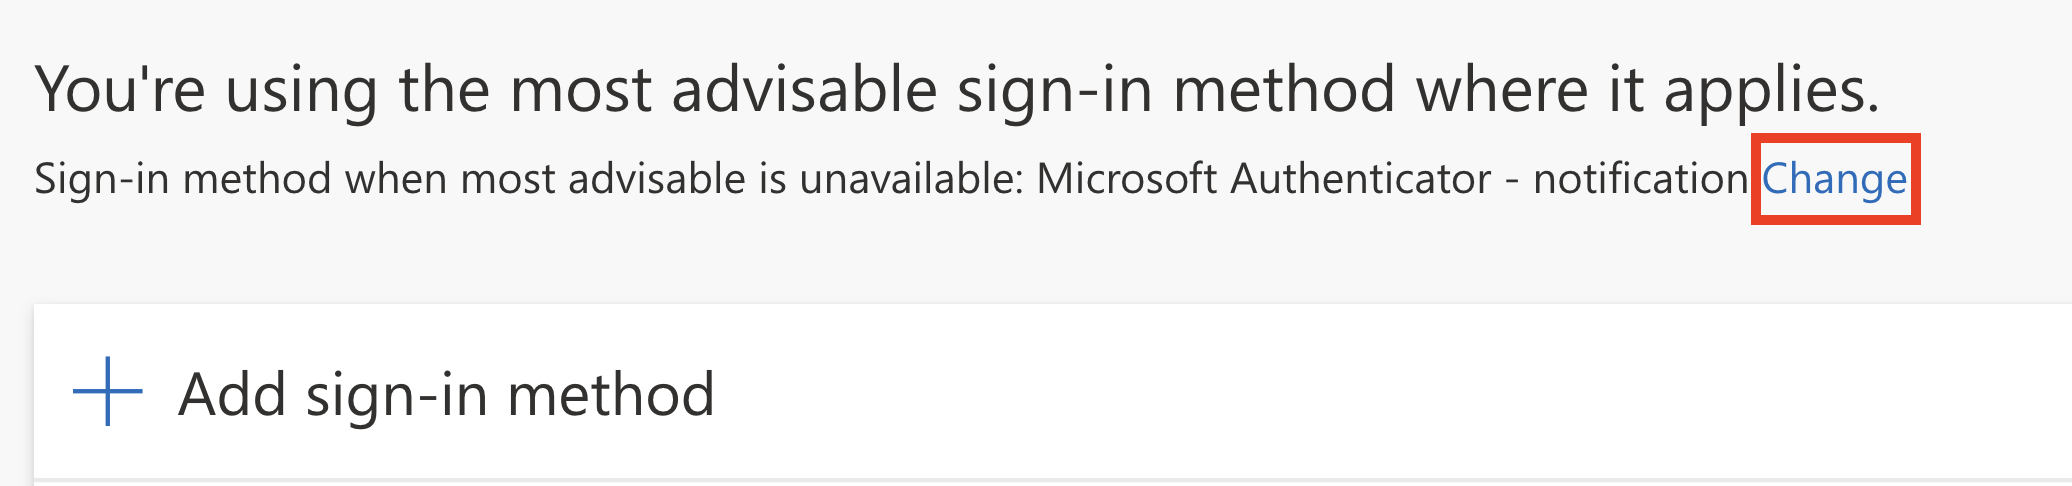
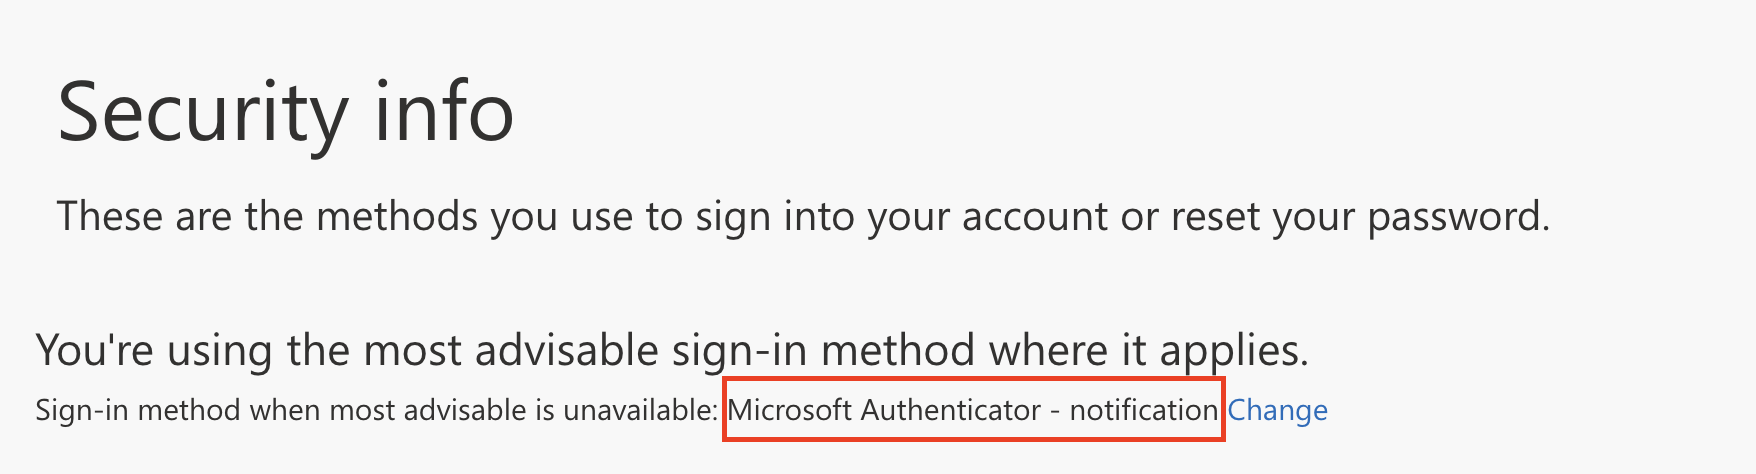
- Under "Default sign-in method," click Change.
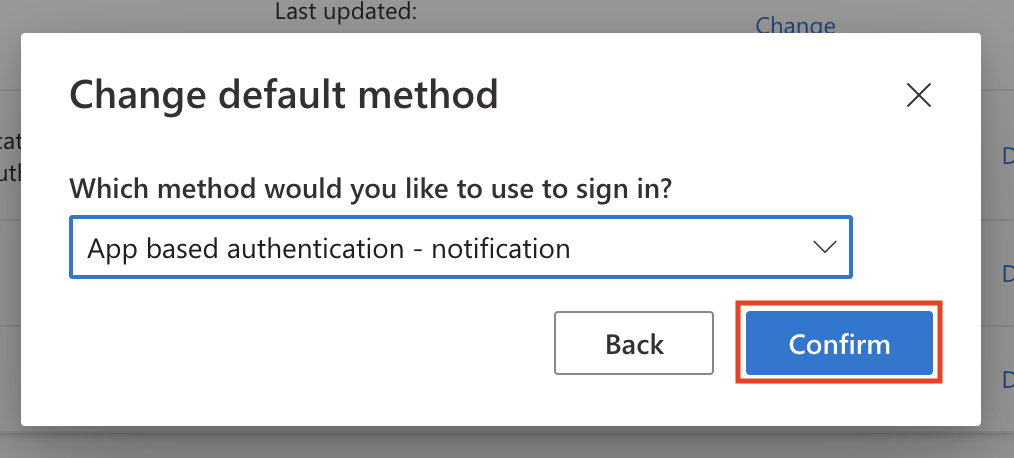
- The "Change default method" window will appear. Under "Which method would you like
to use to sign in?" select "App based authentication- Notification" from the drop-down menu and click the Confirm button.
"Microsoft Authenticator - notification" will appear as the sign-in option when most advisable is unavailable. Next to the change button.
You are all set!